Step 1: Create a New Bot on Discord Developer Portal
1. Go to https://discord.com/developers/applications
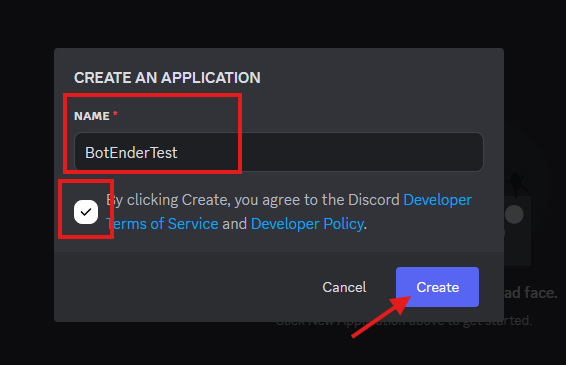
Log in with your Discord account.2. Click on “New Application”
Give your bot a name (e.g.,BotEnderTest).
3. Go to “Bot” in the side menu
Click “Reset Token” > “Yes, do it!“
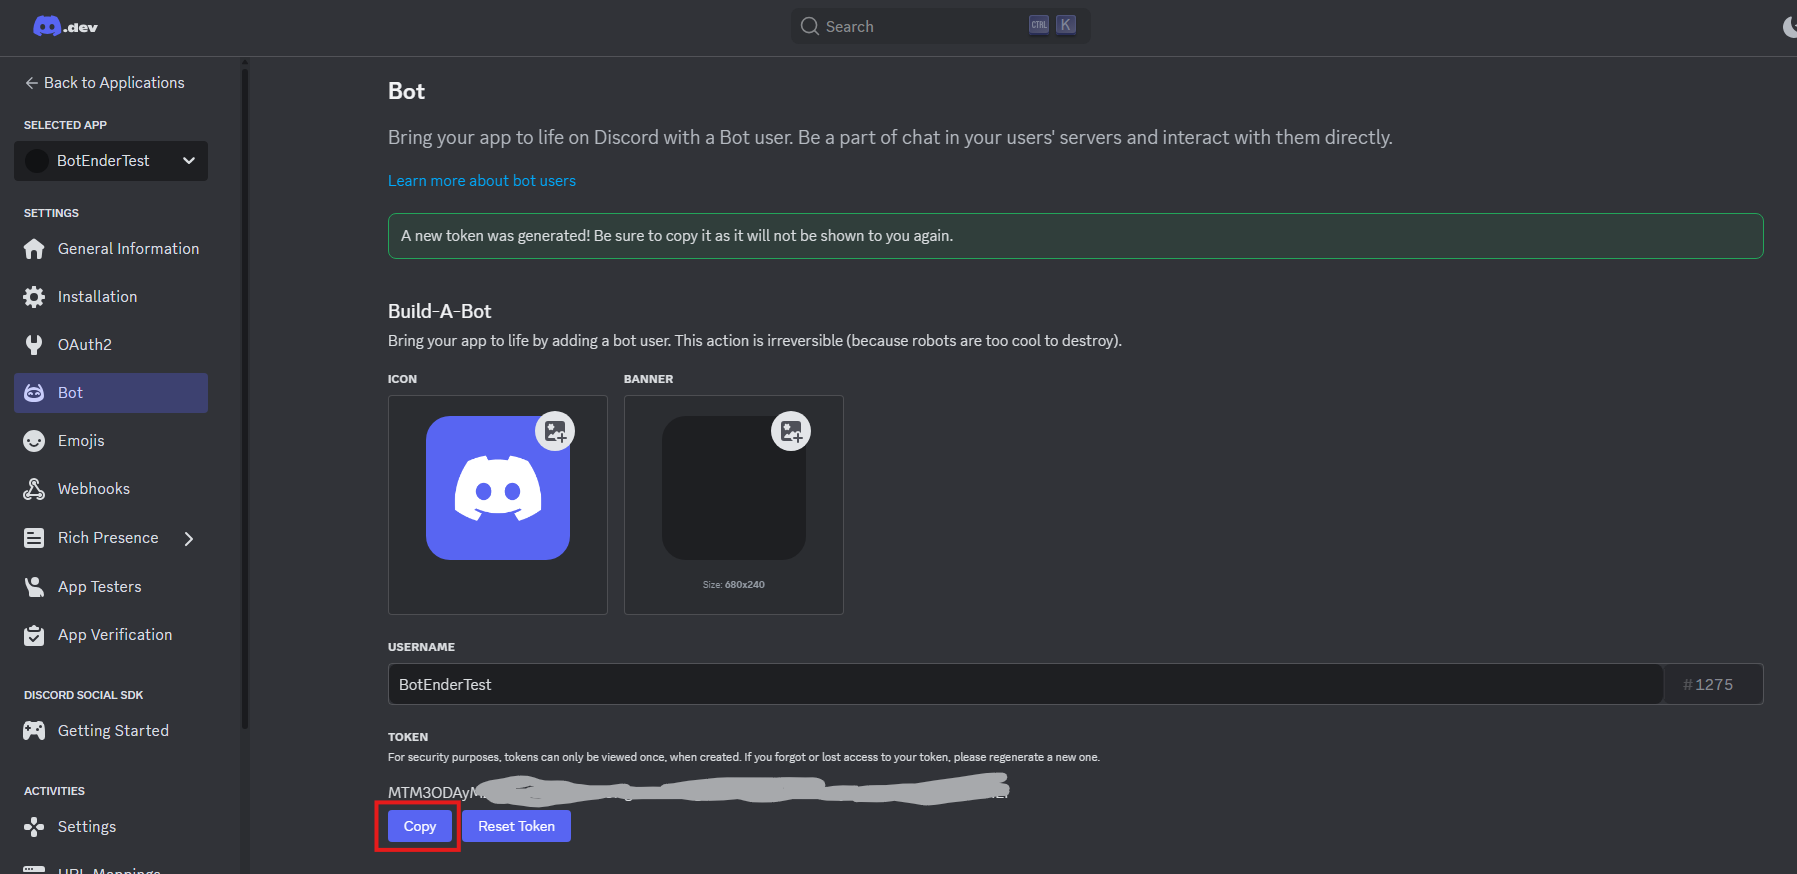
4. Copy the Bot Token
Scroll and click on “Reset Token” > “Copy” ⚠️ Never share the token!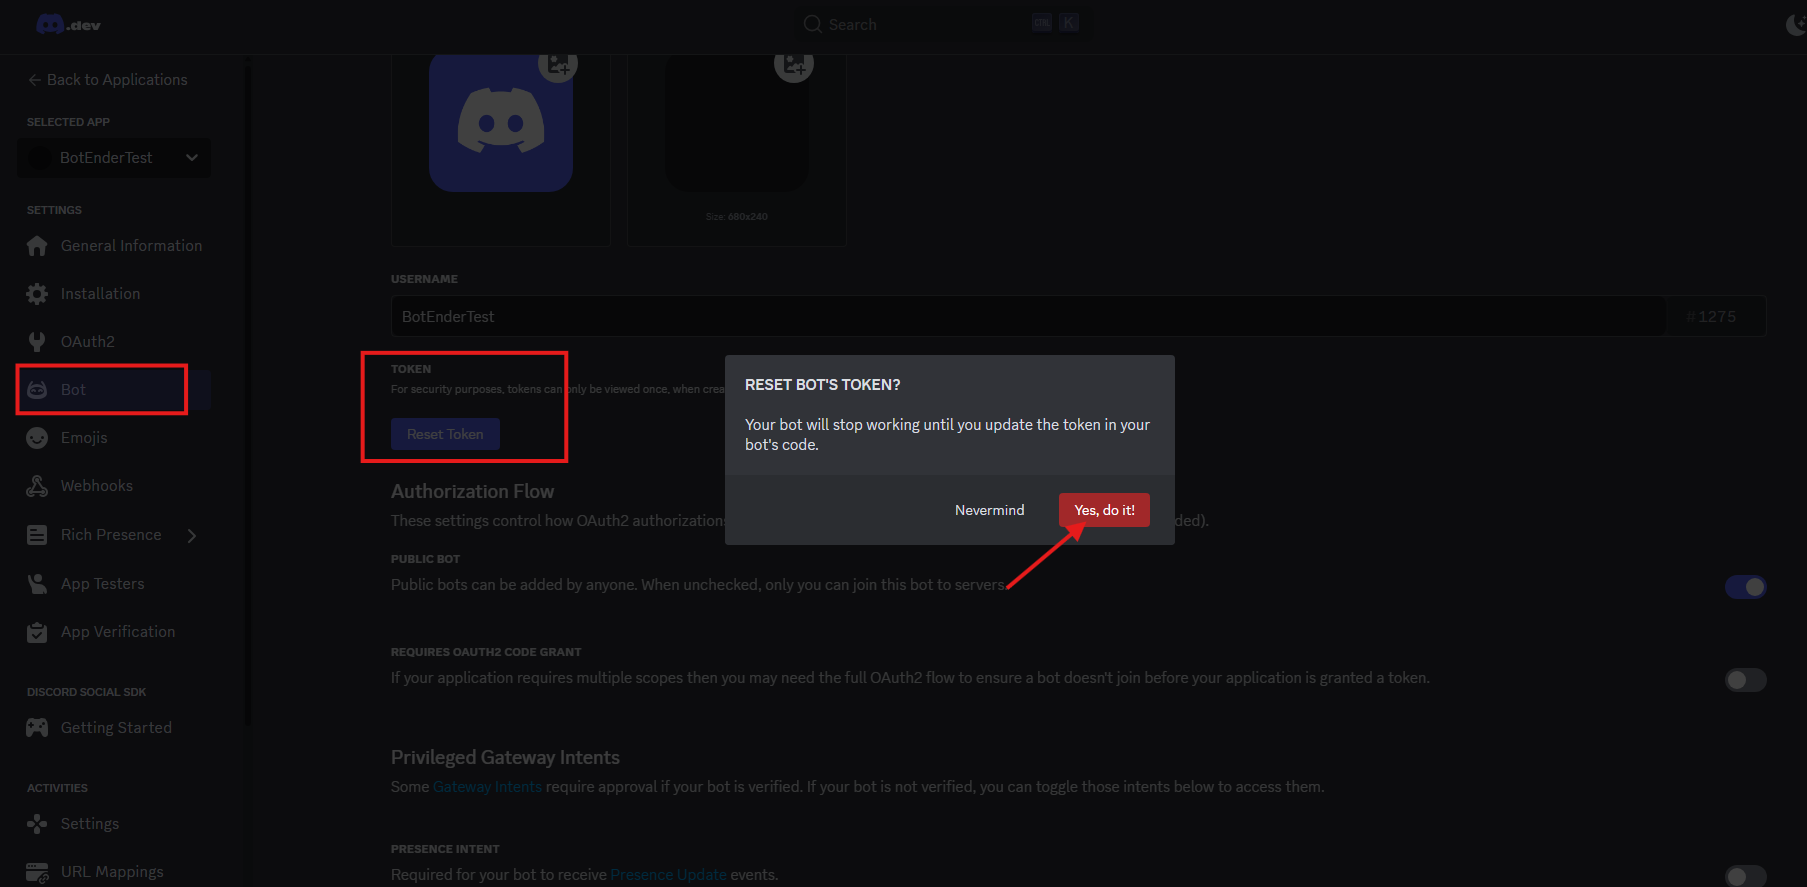
Step 2: Set Bot Permissions
Note: Without further modification in Bot / Public Bot, the bot will be public, so anyone clicking on the bot can add it.
1. Go back to “OAuth2” > “URL Generator”
-
Scope: select
bot -
Bot Permissions: select the necessary permissions (e.g.,
Send Messages,Manage Roles, etc.)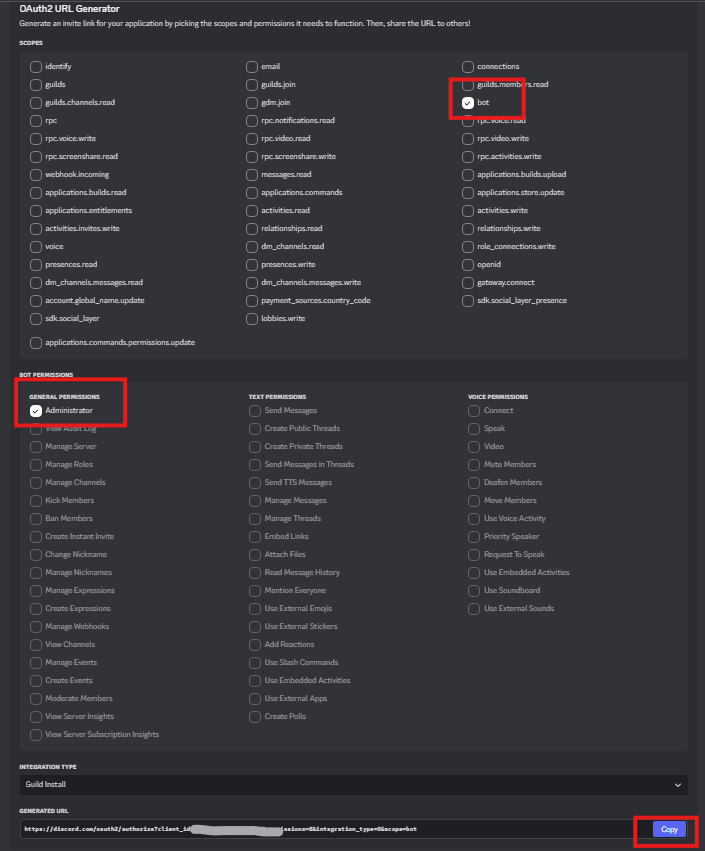
2. Copy the generated URL and paste it into the browser
- Invite the bot to your server
Step 3: Prepare the bot.py / bot.js File
Create a file called bot.py with your bot’s basic code (e.g., with nextcord, discord.py, py-cord, etc.). Or commission the creation of the bot from enderdevelopment.com.
Step 4: Install Dependencies
Open the terminal in the folder wherebot.py is located, and run:
pip install nextcord
Obviously, if you use another library, adapt the command.
Step 5: Start the Bot Locally
Open the terminal in the folder wherebot.py is located, and run:
python bot.py
Obviously, if you use another language or filename, adapt the command.
Step 6: Host the Bot Online
Recommended Option
Option A – VPS (e.g., DeluxHost)
- Purchase a VPS from DeluxHost
- Upload files via SFTP/SSH
- Install Python (
sudo apt install python3-pip) - Install libraries (
pip3 install nextcord) - Start the bot with
screenortmux