> ## Documentation Index
> Fetch the complete documentation index at: https://docs.highmark.it/llms.txt
> Use this file to discover all available pages before exploring further.
# Complete Cloudflare Guide
> Learn how to configure Cloudflare to protect your site, manage DNS, and improve performance.
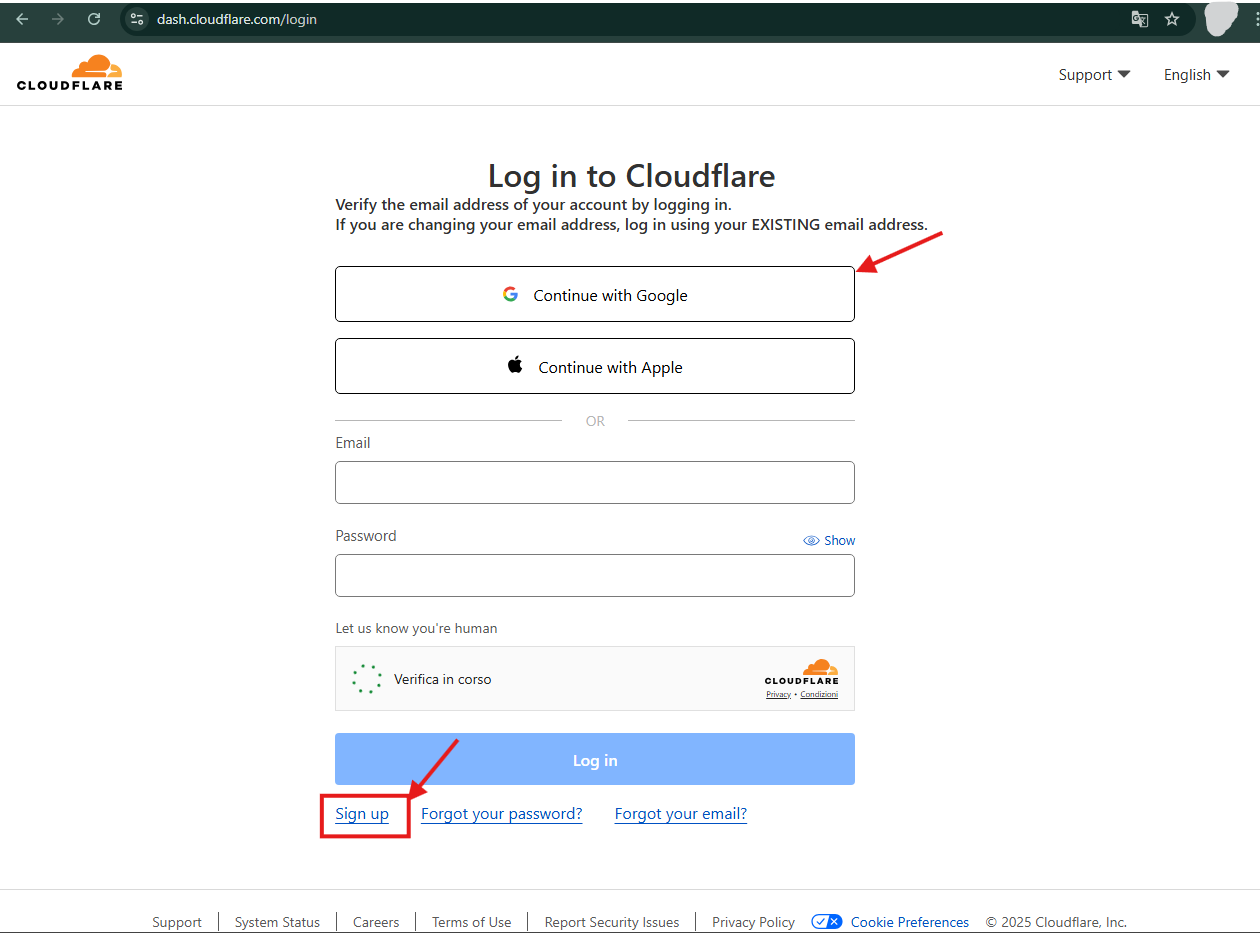
## 1. Creating a Cloudflare Account
1. **Access the Cloudflare website**
Go to [https://www.cloudflare.com](https://www.cloudflare.com/) and click on the **Sign Up** button.
 2. **Fill out the registration form**
Enter a valid email and create a secure password. Click on **Create Account**.
2. **Fill out the registration form**
Enter a valid email and create a secure password. Click on **Create Account**.
 3. **Confirm email**
Check your email inbox for a message from Cloudflare and click the link to verify the address (it might end up in spam).
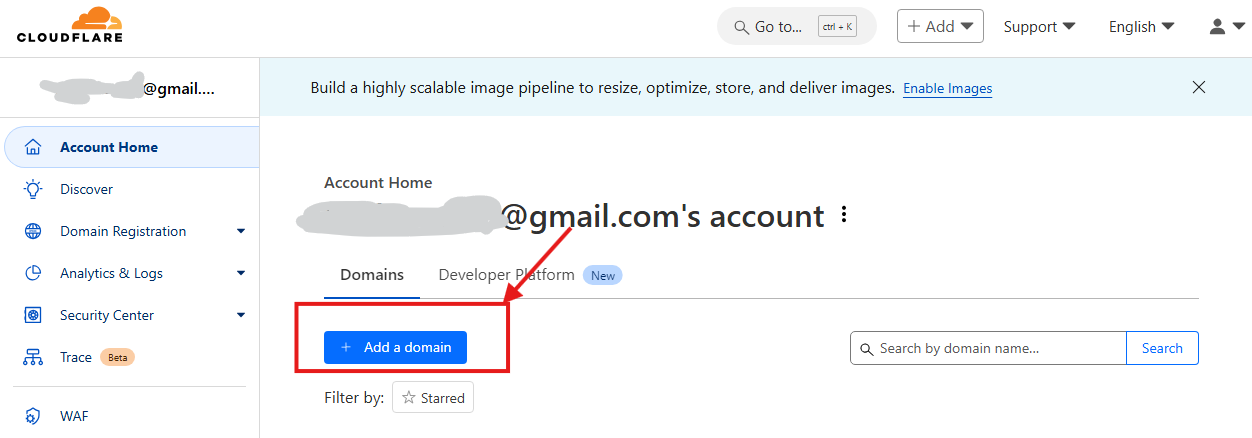
## 2. Adding a Domain on Cloudflare
1. **Access the dashboard**
Once logged in, click on **Add a Site**.
3. **Confirm email**
Check your email inbox for a message from Cloudflare and click the link to verify the address (it might end up in spam).
## 2. Adding a Domain on Cloudflare
1. **Access the dashboard**
Once logged in, click on **Add a Site**.
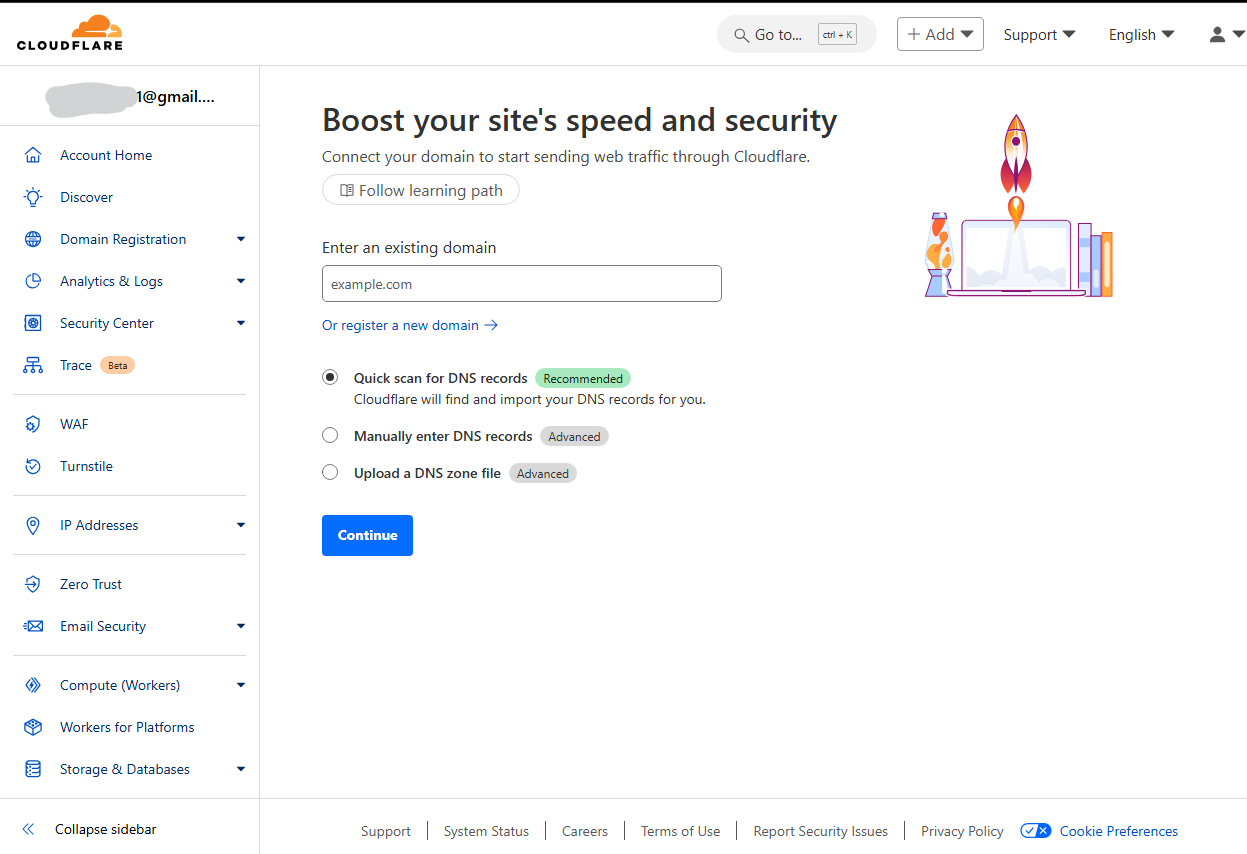
 2. **Enter your domain**
Type the name of the domain you want to add (example: `your-domain.com`) and click on **Add Site**.
2. **Enter your domain**
Type the name of the domain you want to add (example: `your-domain.com`) and click on **Add Site**.
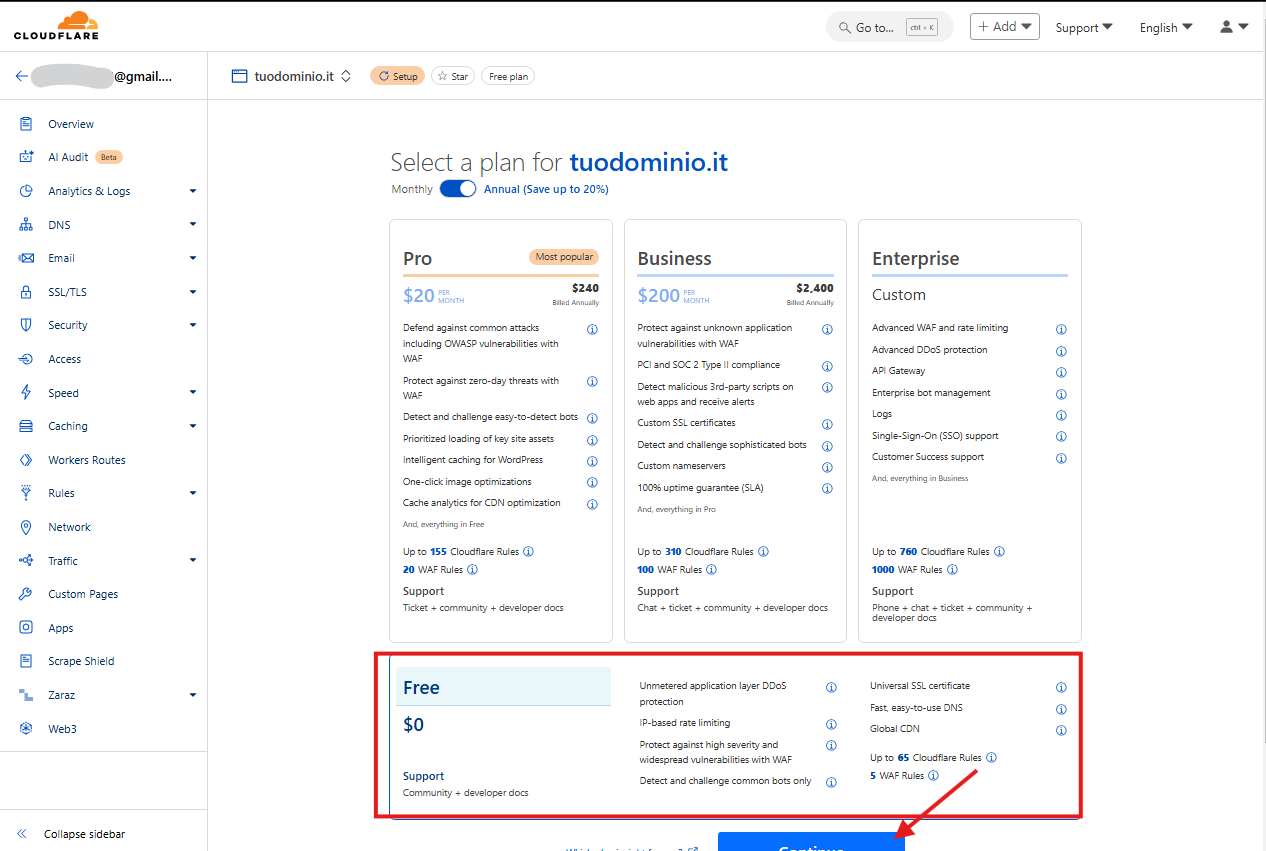
 3. **Select a plan**
Choose the free plan (Free) or a paid one based on your needs, then click on **Continue**.
3. **Select a plan**
Choose the free plan (Free) or a paid one based on your needs, then click on **Continue**.
 4. **Check existing DNS**
Cloudflare will analyze the existing DNS records for your domain. Verify they are correct and click on **Continue**.
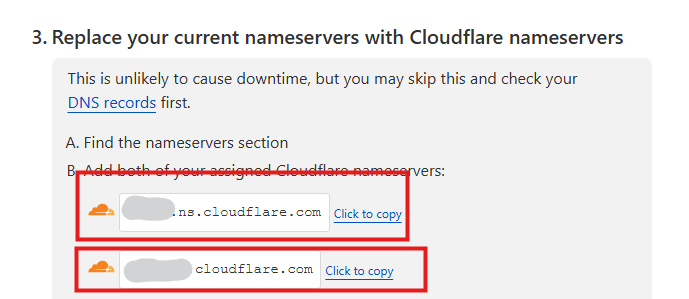
5. **Update domain nameservers**
Cloudflare will provide you with two nameservers. Access your domain management panel (e.g., on your domain provider's site), find the "Nameserver" section, and replace the existing ones with Cloudflare's.
4. **Check existing DNS**
Cloudflare will analyze the existing DNS records for your domain. Verify they are correct and click on **Continue**.
5. **Update domain nameservers**
Cloudflare will provide you with two nameservers. Access your domain management panel (e.g., on your domain provider's site), find the "Nameserver" section, and replace the existing ones with Cloudflare's.
 6. **Verify the update**
Return to Cloudflare and click on **Done, check nameservers**. You may need to wait a few hours for the change to propagate (up to 24-48h, but often much faster).
## 3. Creating a DNS Record
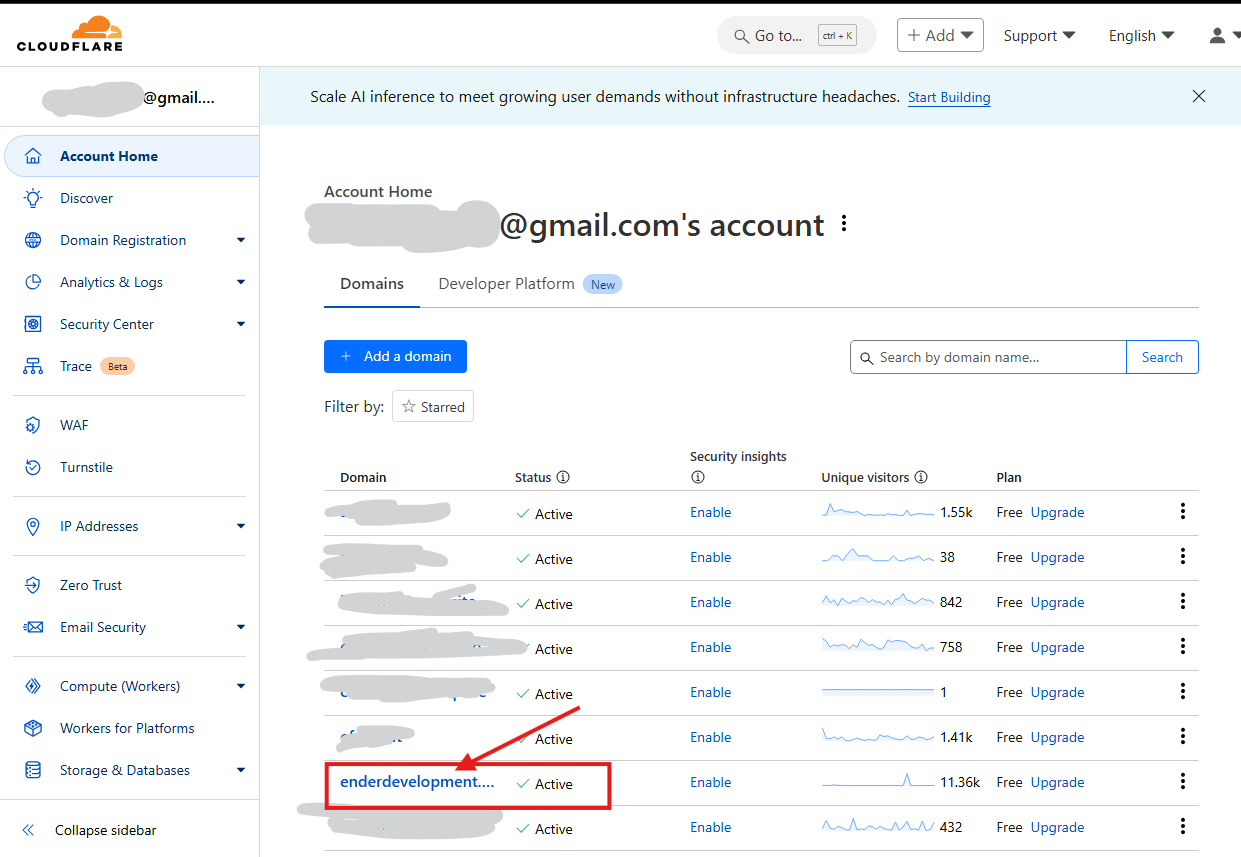
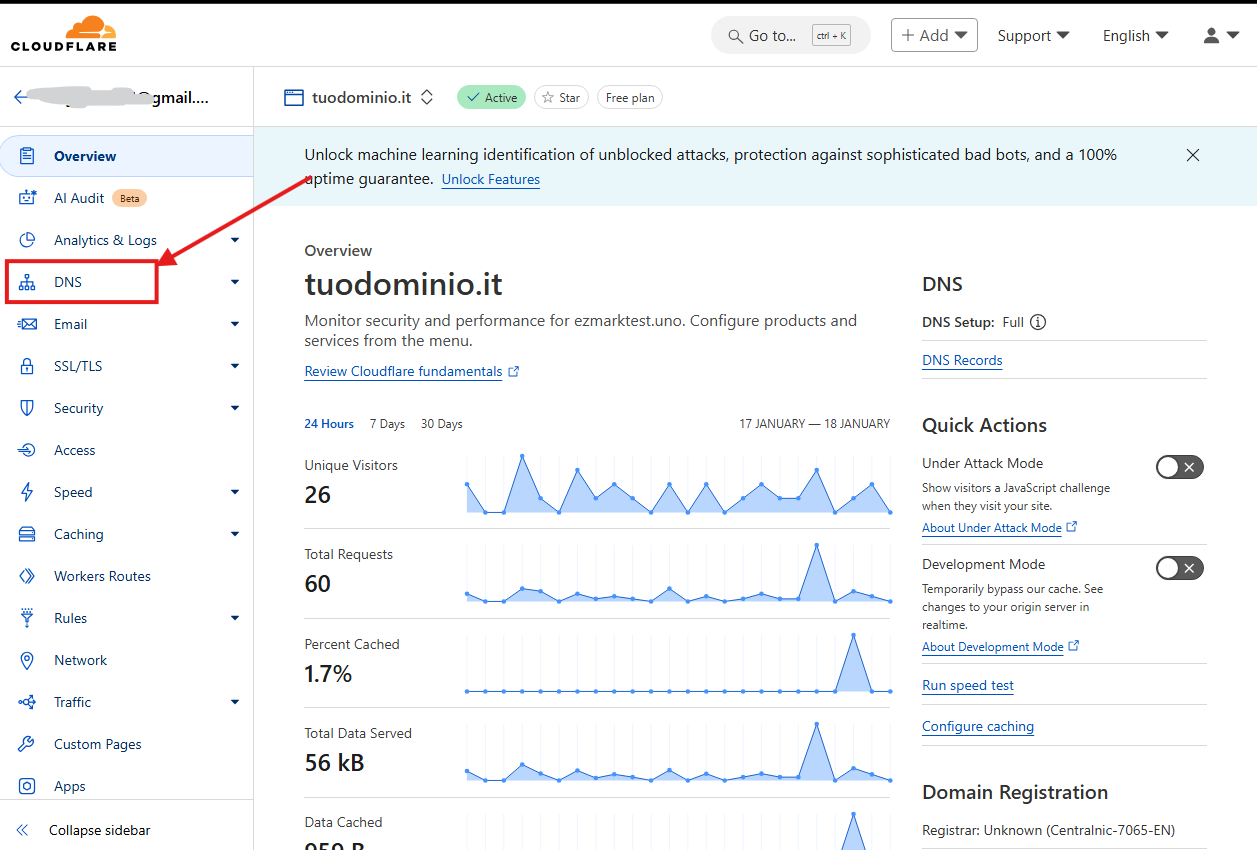
1. **Access the DNS section**
In the Cloudflare panel, select your domain and click on **DNS** in the side menu.
6. **Verify the update**
Return to Cloudflare and click on **Done, check nameservers**. You may need to wait a few hours for the change to propagate (up to 24-48h, but often much faster).
## 3. Creating a DNS Record
1. **Access the DNS section**
In the Cloudflare panel, select your domain and click on **DNS** in the side menu.
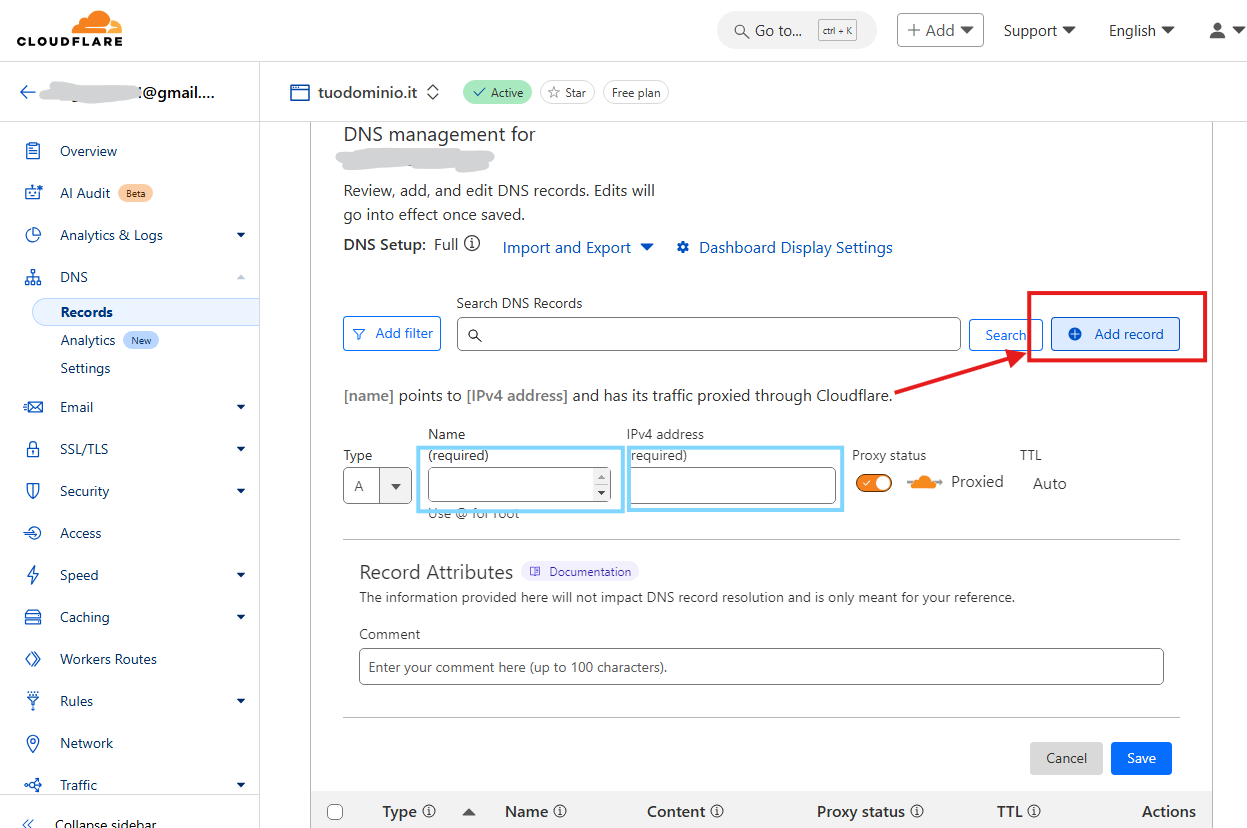
 2. **Add a new record**
Click on **Add Record** and fill in the following fields:
* **Type**: Select the record type (example: A, CNAME, TXT, etc.).
* **Name**: Enter the record name (example: "www" or "@" for the root).
* **Content**: Enter the corresponding value, such as the IP address or alias of the record.
* **TTL**: Leave the default value (Auto) or customize it.
* **Proxy Status**: Choose whether to enable Cloudflare proxy (orange cloud) or DNS only (gray cloud). The orange cloud protects your IP and activates the CDN.
2. **Add a new record**
Click on **Add Record** and fill in the following fields:
* **Type**: Select the record type (example: A, CNAME, TXT, etc.).
* **Name**: Enter the record name (example: "www" or "@" for the root).
* **Content**: Enter the corresponding value, such as the IP address or alias of the record.
* **TTL**: Leave the default value (Auto) or customize it.
* **Proxy Status**: Choose whether to enable Cloudflare proxy (orange cloud) or DNS only (gray cloud). The orange cloud protects your IP and activates the CDN.
 3. **Save the record**
Click on **Save** to complete the operation. The record will be immediately visible in the list.
This is not the official Cloudflare guide; you will find the official documentation on their website.
## 4. Test and Verification
1. **Verify operation**
Use tools like [https://dnschecker.org](https://dnschecker.org/) to check that DNS records are configured correctly.
2. **Test the domain**
Access your domain from the browser to verify it is correctly routed through Cloudflare.
Guide created by HighMark - All information and contacts on my [official website: Highmark.it](https://highmark.it)
3. **Save the record**
Click on **Save** to complete the operation. The record will be immediately visible in the list.
This is not the official Cloudflare guide; you will find the official documentation on their website.
## 4. Test and Verification
1. **Verify operation**
Use tools like [https://dnschecker.org](https://dnschecker.org/) to check that DNS records are configured correctly.
2. **Test the domain**
Access your domain from the browser to verify it is correctly routed through Cloudflare.
Guide created by HighMark - All information and contacts on my [official website: Highmark.it](https://highmark.it)