> ## Documentation Index
> Fetch the complete documentation index at: https://docs.highmark.it/llms.txt
> Use this file to discover all available pages before exploring further.
# How to Host a Discord Bot
> In this guide, I will explain how to create a bot on Discord, get the token, configure it in your bot.py script, and bring it online. Putting a bot online allows you to automate actions in servers, create advanced systems (moderation, tickets, music, etc.), and learn how to manage APIs.
This guide is provided for educational purposes. We assume no responsibility for any errors, data loss, or token exposure that may result from incorrect use of the procedures described.
## Step 1: Create a New Bot on Discord Developer Portal
### 1. Go to [https://discord.com/developers/applications](https://discord.com/developers/applications)
Log in with your Discord account.
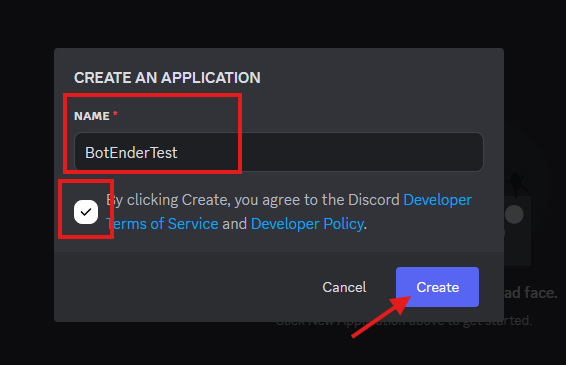
### 2. Click on "New Application"
Give your bot a name (e.g., `BotEnderTest`).
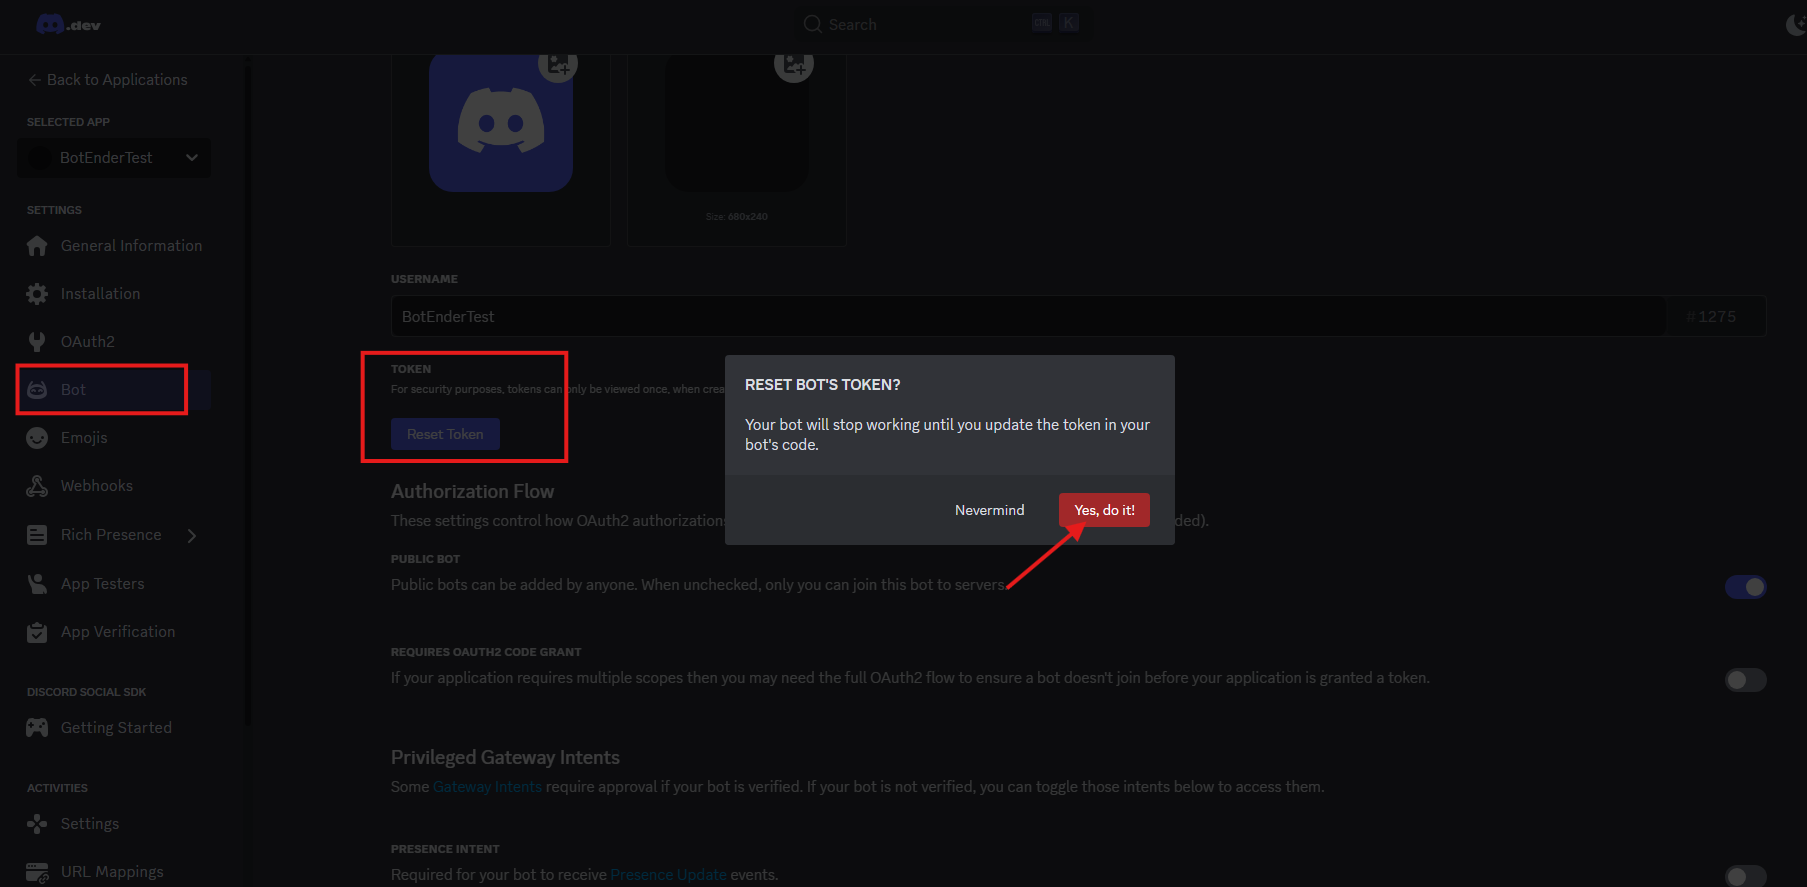
 ### 3. Go to "Bot" in the side menu
Click "Reset Token" > "Yes, do it!"
### 3. Go to "Bot" in the side menu
Click "Reset Token" > "Yes, do it!"
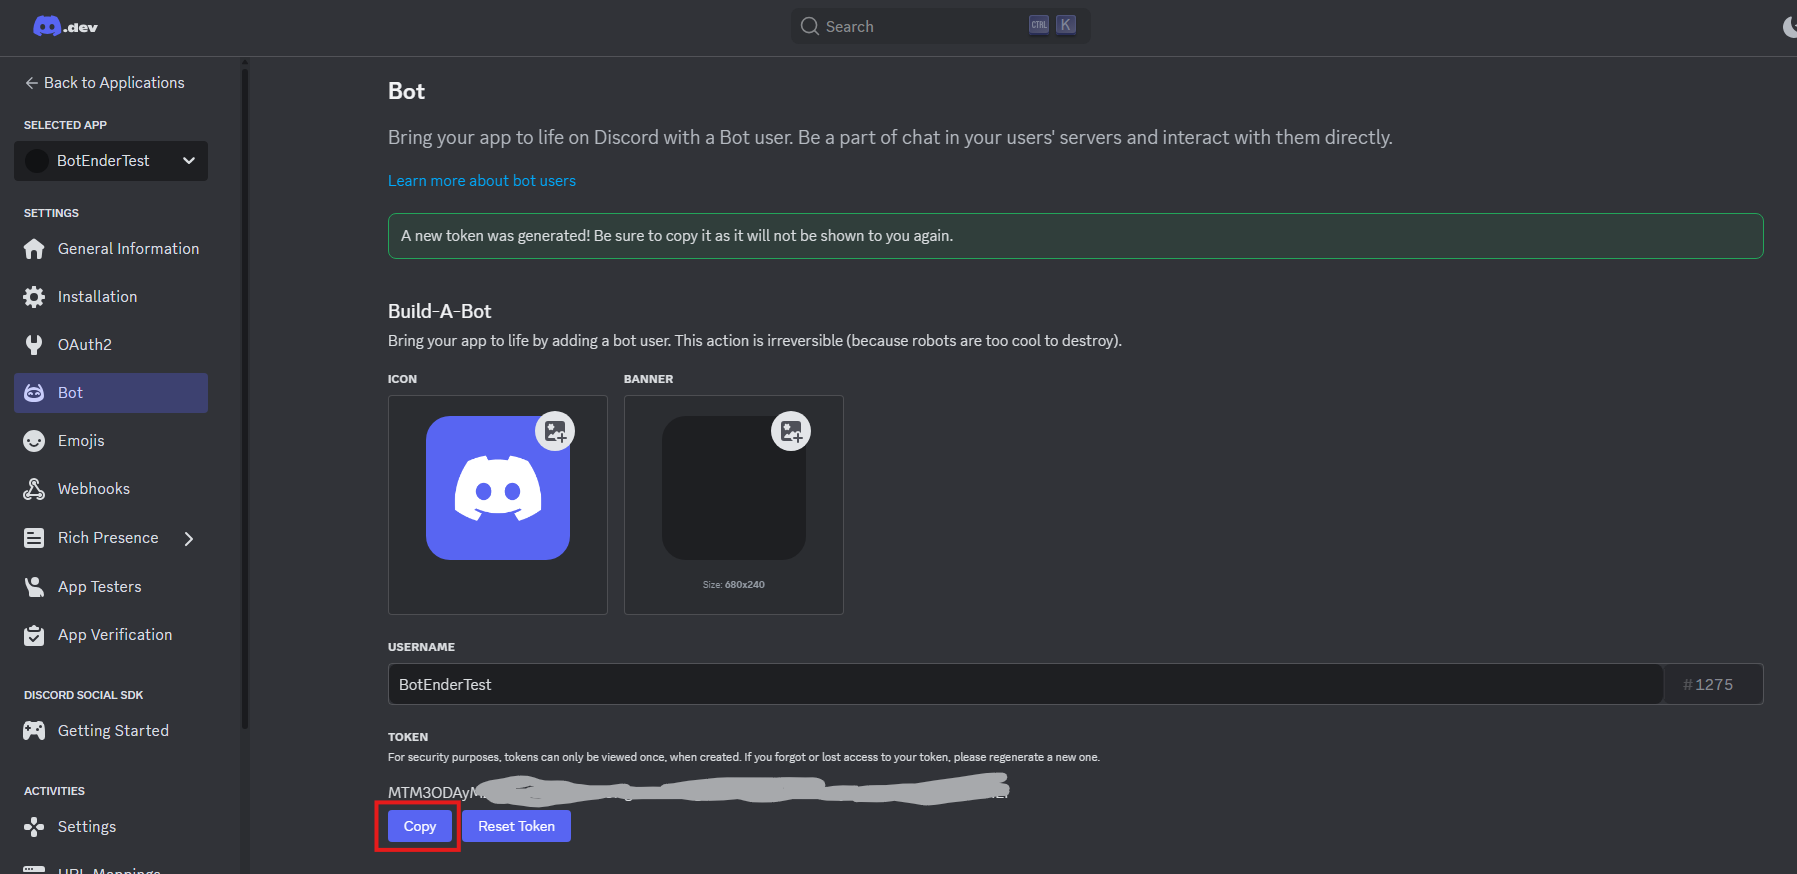
 ### 4. Copy the Bot Token
Never share the bot token or upload it publicly!
If you think it has been compromised, regenerate it immediately from the Developer Portal.
Scroll and click on “Reset Token” > "Copy"
⚠️ *Never share the token!*
### 4. Copy the Bot Token
Never share the bot token or upload it publicly!
If you think it has been compromised, regenerate it immediately from the Developer Portal.
Scroll and click on “Reset Token” > "Copy"
⚠️ *Never share the token!*
 ## Step 2: Set Bot Permissions
Note: Without further modification in Bot / Public Bot, the bot will be public, so anyone clicking on the bot can add it.
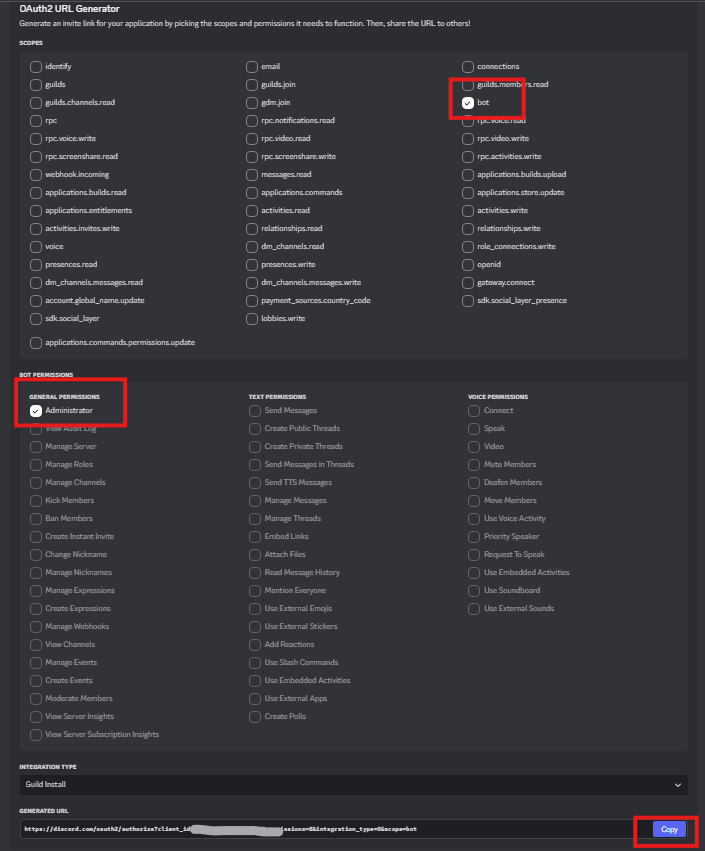
### 1. Go back to "OAuth2" > "URL Generator"
ATTENTION: Many bots often require administrative privileges, but only set them if you know what you are doing.
Also, most need Intents, you will need to ACTIVATE THEM in Bot / **Privileged Gateway Intents and activate all items in that paragraph**
* Scope: select `bot`
* Bot Permissions: select the necessary permissions (e.g., `Send Messages`, `Manage Roles`, etc.)
## Step 2: Set Bot Permissions
Note: Without further modification in Bot / Public Bot, the bot will be public, so anyone clicking on the bot can add it.
### 1. Go back to "OAuth2" > "URL Generator"
ATTENTION: Many bots often require administrative privileges, but only set them if you know what you are doing.
Also, most need Intents, you will need to ACTIVATE THEM in Bot / **Privileged Gateway Intents and activate all items in that paragraph**
* Scope: select `bot`
* Bot Permissions: select the necessary permissions (e.g., `Send Messages`, `Manage Roles`, etc.)
 ### 2. Copy the generated URL and paste it into the browser
* Invite the bot to your server
## Step 3: Prepare the `bot.py` / `bot.js` File
Create a file called `bot.py` with your bot's basic code (e.g., with `nextcord`, `discord.py`, `py-cord`, etc.). Or commission the creation of the bot from `enderdevelopment.com`.
## Step 4: Install Dependencies
Open the terminal in the folder where `bot.py` is located, and run:
`pip install nextcord`
Obviously, if you use another library, adapt the command.
## Step 5: Start the Bot Locally
It is often discouraged to run a bot locally for production environments. Run it locally only for testing or development.
Open the terminal in the folder where `bot.py` is located, and run:
`python bot.py`
Obviously, if you use another language or filename, adapt the command.
## Step 6: Host the Bot Online
Recommended Option
### Option A – VPS (e.g., DeluxHost)
* Purchase a VPS from [DeluxHost](https://deluxhost.it)
* Upload files via SFTP/SSH
* Install Python (`sudo apt install python3-pip`)
* Install libraries (`pip3 install nextcord`)
* Start the bot with `screen` or `tmux`
### 2. Copy the generated URL and paste it into the browser
* Invite the bot to your server
## Step 3: Prepare the `bot.py` / `bot.js` File
Create a file called `bot.py` with your bot's basic code (e.g., with `nextcord`, `discord.py`, `py-cord`, etc.). Or commission the creation of the bot from `enderdevelopment.com`.
## Step 4: Install Dependencies
Open the terminal in the folder where `bot.py` is located, and run:
`pip install nextcord`
Obviously, if you use another library, adapt the command.
## Step 5: Start the Bot Locally
It is often discouraged to run a bot locally for production environments. Run it locally only for testing or development.
Open the terminal in the folder where `bot.py` is located, and run:
`python bot.py`
Obviously, if you use another language or filename, adapt the command.
## Step 6: Host the Bot Online
Recommended Option
### Option A – VPS (e.g., DeluxHost)
* Purchase a VPS from [DeluxHost](https://deluxhost.it)
* Upload files via SFTP/SSH
* Install Python (`sudo apt install python3-pip`)
* Install libraries (`pip3 install nextcord`)
* Start the bot with `screen` or `tmux`